- Empty cart.
- Continue Shopping
Simplify Floor Stripping with These Expert Tips
- Posted on
Editor
- 0
- Categories: Uncategorized
Clean and glossy hard floors depend a lot on the regular maintenance task of floor stripping. If you have vinyl, linoleum or tile, using floor stripping gets rid of old wax, dirt and buildup to show the fresh floor underneath. By using this technique, the floor improves in appearance and stays unharmed, with another layer put over it.
Lots of people avoid floor stripping because it seems slow and complicated—mainly due to avoiding the correct equipment and ways of doing it. This guide will show you how to get great floor stripping results with very little effort. No matter if you clean often, oversee a company or work on a big task at home, these ideas will help you clean more easily.
Why Floor Stripping is Necessary
Floor wax and polish eventually attract dirt, scuff marks and stains. Frequent cleaning isn’t able to scrub out this serious dirt. Regular mopping and buffing of your naked tile cannot stop it from looking uneven, dull and stained.
Due to heavy traffic, hospital, school, office and retail areas require proper stripping more than others. It refreshes the surface so that the next steps such as coating, polishing or sealing, go more smoothly. Cleaning stripped and finished flooring is simple, it can save you from more damages and they look very organized and well-kept.
What Is a Floor Stripper?
A floor stripper is made to dissolve old wax, sealant or polish from hard flooring. The coating is dissolved by the cleaner so it can be picked up or washed off by a mop, scrubber or buffer. Categories of floor stripper usually depend on how acidic or basic they are and on the kind of solvent they contain.
There are two main types of floor strippers:
- Solvent-based strippers: Effective but often have strong odors and require adequate ventilation.
- Water-based strippers: More eco-friendly, less toxic, and safer to use indoors.
It is very important to match the floor stripper to your flooring and coating to avoid any damage to the surface.
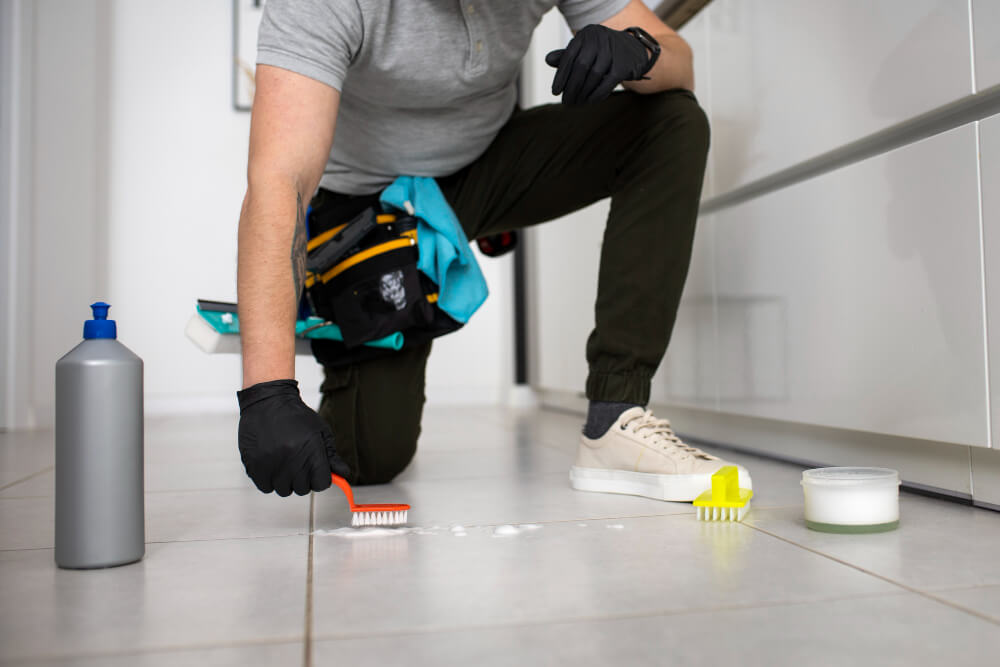
Step-by-Step Floor Stripping Guide
- Clear the Area
Take away all of the furniture, rugs, mats and movable equipment. Do a quick sweep or vacuum to get rid of loose dust and other debris. Nothing will meet resistance or impact how the chemicals are put on or the machine works.
- Ventilate the Space
People can experience strong odors from using floor strippers. Open your windows and doors so that the air in your house circulates. If your work area is compact, turn on a fan for ventilation and/or put on a respirator mask.
- Wear Protective Gear
Wear safety goggles, chemical-resistant gloves, long sleeves and rubber shoes whenever you are floor stripping because the chemicals are strong. Stay away from touching the stripper and remember to put safety signs in business areas.
- Select the Right Floor Stripper
Consider what finishing material you are working with, what type of floor your removing it from and the local safety regulations. Read how the product should be mixed with water and if it suits the floor you have. Make sure to use gentle strippers on gentle surfaces.
- Dilute and Apply
Blend the floor stripper as described by its manufacturer. Be sure not to go over the appropriate limits for chemicals. Evenly put the solution onto a manageable part of the floor using a mop or sprayer, often covering about 10×10 feet at a time. Add more contact lens solution before the first coating dries.
- Let It Dwell
Leave the solution on the floor for as long as the manufacturer says—usually, this is between 5 and 15 minutes. This allows the chemicals to start working on the wax or polish.
- Scrub Thoroughly
Put a black stripping pad on your floor scrubber or slow buffer to work into the floor. Small areas do not require anything stronger than a small brush or manual scrubber. Remember to scrub the corners, baseboards and difficult-to-access parts of the house.
- Pick Up the Residue
Use a wet vacuum or mop to remove the dirty stripper solution. Rinse the mop frequently and change the water as needed to avoid re-depositing dirt.
- Neutralize the Floor
Make sure to rinse the floor with clean water that contains a neutralizer or a mild detergent to remove any left behind residue. It is important to do this step so the finish sticks well to the surface.
- Let the Floor Dry Completely
Before applying any new finish or wax, make sure the floor is completely dry. Any moisture left behind can cause streaks, bubbles, or poor adhesion.
Expert Tips to Simplify the Process
- Use an Auto-Scrubber
Cleaning a big area can be much easier and quicker with the help of an auto-scrubber. They complete chemical application, scrubbing and vacuuming during a single cycle which is efficient and useful.
- Divide Work Into Sections
Taking stripping one small area at a time helps you manage your dwell times and get even results. You are less likely to have the stripper dry out before you apply your scrub.
- Use a Black Pad for Heavy Build-Up
When there are many layers of wax or polish on the floor, a black stripping pad will do the job best. Yet, don’t use this bleach on surfaces that could be harmed by it.
- Double-Check High Traffic Zones
Wax tends to concentrate in these spots and hence may have to be reapplied. Spend a little time on these spots to make sure you have the same results each time.
- Dispose of Chemicals Responsibly
Floor stripping chemicals and water should be followed by local rules regarding its disposal. Prevent dumping them into storm drains or outside.
Common Floor Stripping Mistakes to Avoid
- Skipping the Neutralizing Step
Failing to neutralize the floor after you strip it may cause new finishes to not stick properly. It might form tacky film that grabs on to dirt.
- Using the Wrong Stripper
Certain floor stripper types may not be safe for every kind of surface. Inappropriate products might ruin the flooring, change its appearance or leave marks that stay visible.
- Letting the Stripper Dry
A stripper stays wet throughout the entire dwell period. When diapers dry out, they become useless and hard to remove the sticky mess left behind.
- Improper Safety Measures
In case people do not have good ventilation, proper equipment or follow safety guidelines, it may cause serious illness or accidents.
- Overlooking Baseboards and Corners
Missing edges and corners is common during floor stripping. Reach the tight areas and keep the coating even by using a hand pad or a small brush.
Maintaining Your Floor After Stripping
- Use a pH-Neutral Cleaner for Routine Cleaning
Once having stripped and refinished, don’t use harsh or acidic cleaners which may harm the finish you just applied. Gentle and effective cleaning happens using a pH neutral cleaner, keeping the floor shining and stopping any harm to its seal.
- Implement Daily Dust Mopping
Dust and other particles can scuff your freshly sanded floor’s finish which can shorten its life. A daily cleaning with a microfiber dust mop will remove dust and make it less likely you’ll damage the surface.
- Place Mats at Entry Points
Shoes get dirty, gritty and wet on mats which catches all this before it touches your floor. Putting good-quality mats at entrances saves the need for frequent polishing and prevents accidental damage to the revived flooring.
- Schedule Regular Buffing and Recoating
Buffing regularly helps keep glossy and removes small nicks, without stripping the paint. Putting on a new coating every few months (related to traffic levels) can help the floor stay durable and presentable.
- Avoid Dragging Furniture or Equipment
Heavy items being moved can nick or scratch the floor finish. Be sure to protect your floor by putting pads under furniture and lift the furniture when you are moving it.
When to Hire a Professional
While DIY floor stripping can be effective for smaller areas, there are situations where hiring a professional is the safer and more efficient choice. If you’re dealing with large commercial spaces, specialty flooring like terrazzo or natural stone, or multiple layers of old wax buildup, professional cleaners bring industrial-grade equipment and advanced techniques that guarantee better results. They are trained to assess floor conditions, use the right floor stripper products, and execute the process without causing damage—something that’s difficult to ensure with limited experience.
In addition, professionals assist you in meeting all compliance laws regarding safety and the environment. Careless floor maintenance in hospitals, schools and food businesses can create hygiene problems or cause legal problems. A professional floor care service takes care of ventilation, how chemicals are handled and waste management. Hiring a professional painter can be quicker than doing the task yourself, less risky and will provide a finish that stays strong for a longer time.
Final Thoughts
Floor stripping doesn’t have to be a daunting task. By using the right floor stripper, protective gear, tools, and techniques, you can achieve impressive results that restore your floor’s original luster and cleanliness. Whether you’re stripping a small kitchen or a 10,000-square-foot office space, breaking the process down into manageable steps and following expert advice will simplify your workload and ensure a professional finish.
With the right approach and a little patience, floor stripping can transform your surfaces and dramatically improve the look and hygiene of your environment. So, the next time your floor starts to look tired and worn, don’t just mop—strip it back to brilliance.